Rule of Thirds
Above show my results from my rule of thirds experiment. I used a grid to measure my rule of thirds taking my photos and then selecting the ones that follow the grid guidelines. This is very helpful in learning how to control balance amongst a photograph as subjects can be placed left, right and centre of the image. For this experiment i decided to use the bin as a simple subject that wouldn't move against the wide field!
Different camera angles
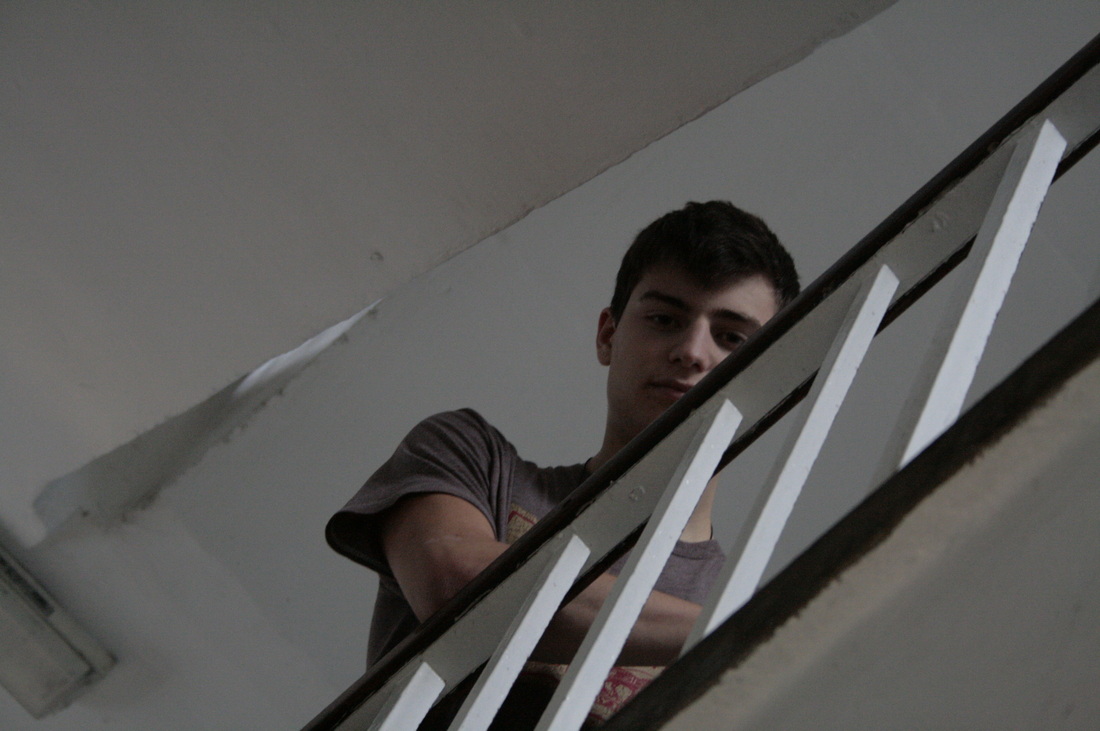
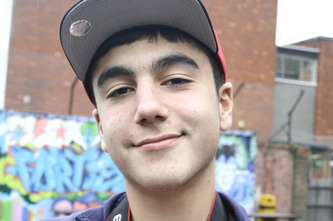
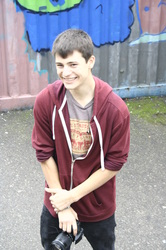
Below show the results of of my first basic portraiture project. Individually we were set out to take different types of shots from different angles. In the middle shows a straight forward portraiture (close up) image. The light in this photo is strong and the larger aperture creates a smaller depth of field concentrating the on the face as the main aspect of the image. The hat of the person in this image also adds to the composition resulting in the top of the face being ever so slightly darker than the rest of the face. This helps to bring most attention to the centre of his face. On the other hand the image below shown on the left is a birds eye shot. This image is good however the face is a bit overexposed. On the other hand this image does involve a nice range in colour with the bright red jumper and the blue background it is also in focus however the overexposure does let the image down a little. Finally the image on the far right shows the worm angle view. This shot seems to have worked very well. There is a strong balance of light and the focus on this image is also very strong. The subject of the image is higher than the camera looking down at the photographer and the railings in this photo are nicely enhanced by the light. Overall this project was very successful in learning about different types of views in photography such as the worms eye, birds eye and close up.
Photoshop Skills
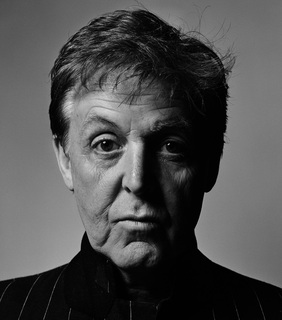
Paul McCartney
Today i looked at a short film which showed how to use photoshop to drastically change the look of someone. The film showed a woman whose face was edited around with on photoshop until she looked very different (a lot younger) from her original self. I then tried this myself. This is an original image of Paul McCartney taken not too long ago. However below this image shows the same image refined to make him look younger. To do this I used the healing brush in photoshop to copy parts of his skin with no wrinkles whatsoever and then placed the younger looking skin on top of the older looking skin. I had a few attempts at this exercise however this particular one came out the best. After using the healing tool I used the blurring tool which helped blur the original skin with the new copied skin on his face.

Photographic Historgrams
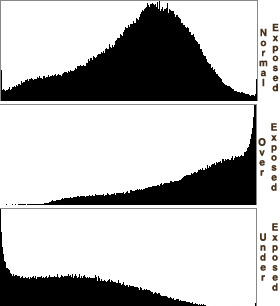
These photograms are used in photography to show the different exposures in each image. The top graph represents an image that has been correctly exposed and therefore the graph peaks in the middle but lowers at either end. Below that the second graph represents an image that has been over exposed with the graph peaking in its height on the right hand side. This is very helpfull when working out exposure levels on a camera. On digital cameras you can acess this option when taking each image. Therefore this is very helpful in determining how to change your aperture or exposure time in order to get the most balanced outcome.
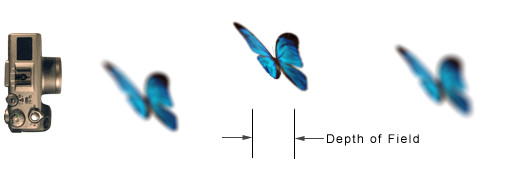
Above shows images with different depths of field. This is key to creating a successful image as different focal lengths can often blur out different parts which may or may not be important to your image. Above show the result from my focal length tests. Overall I was relatively happy with the results. This is because the way in which I have set out the models is a very effective way at showing different depths of field. However this i was slightly unhappy with the different focal lengths produced as I found it difficult to blur one person from another due to the fact they were very close together. This experiment has however helped me learn how to control different depths of field through my camera settings!
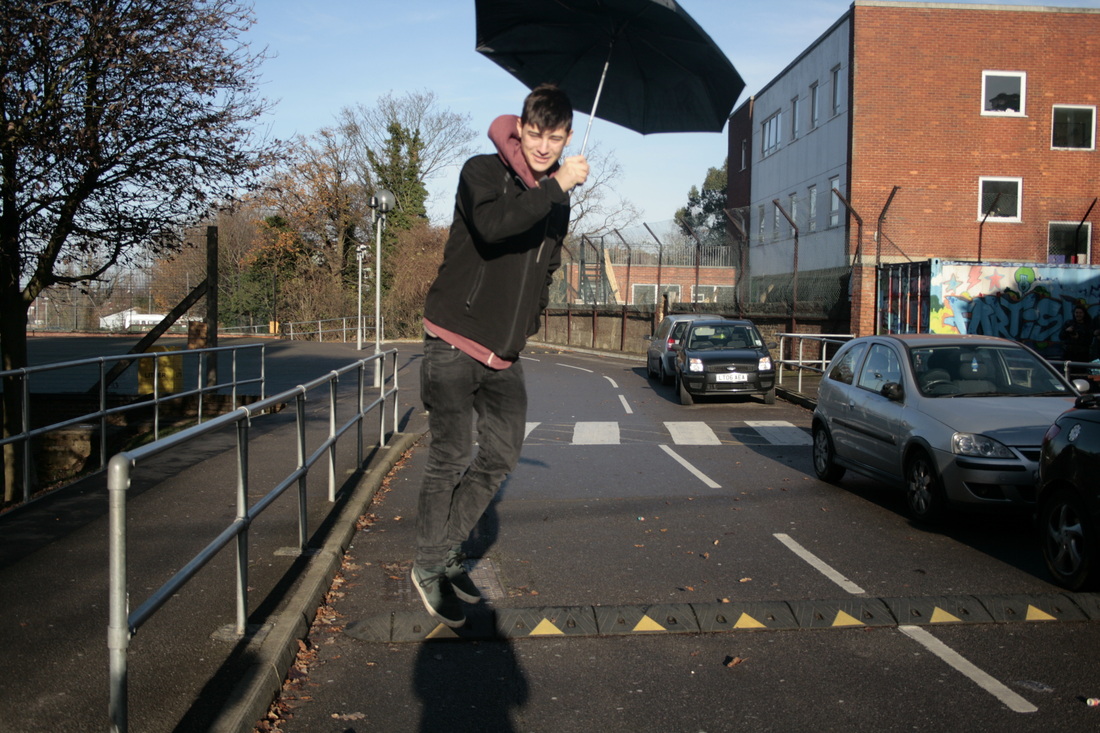
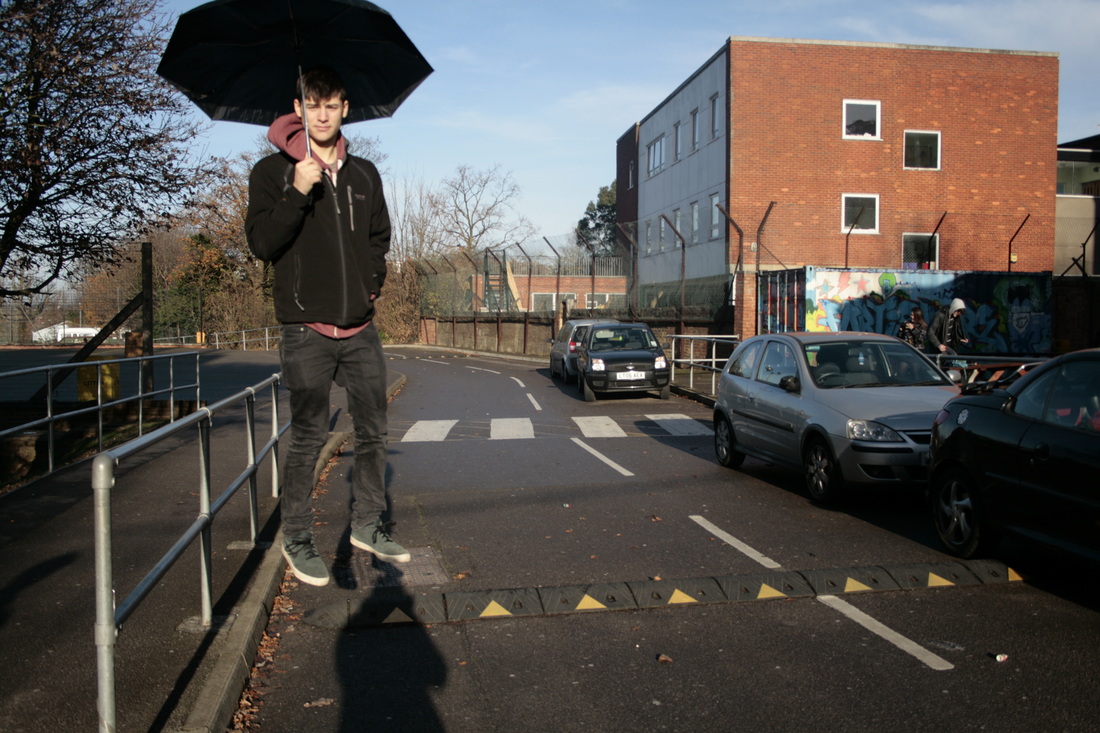
Levitation Project
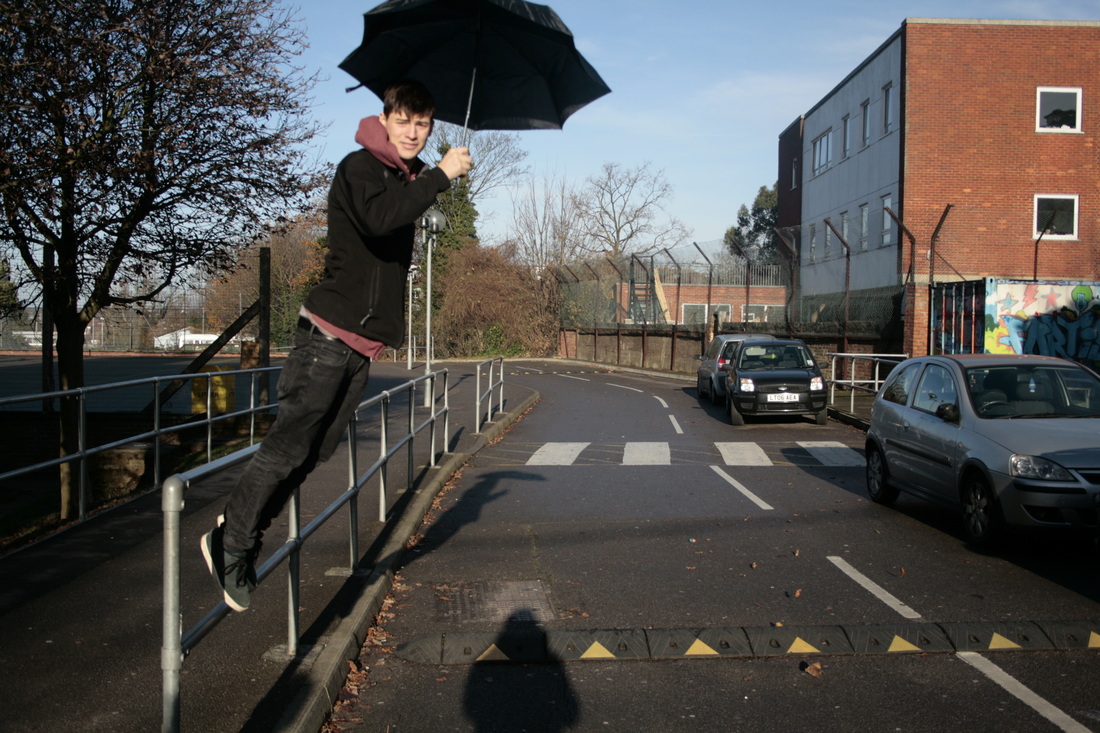
Here my task was to explore the different shutter speeds using the shutter priority setting on my camera. For this project I looked at levitation which involved my trying to portray my model in mid air whilst doing a relevant movement. one important aim of this project was to keep my model in focus whilst he was jumping into mid air.
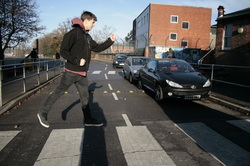
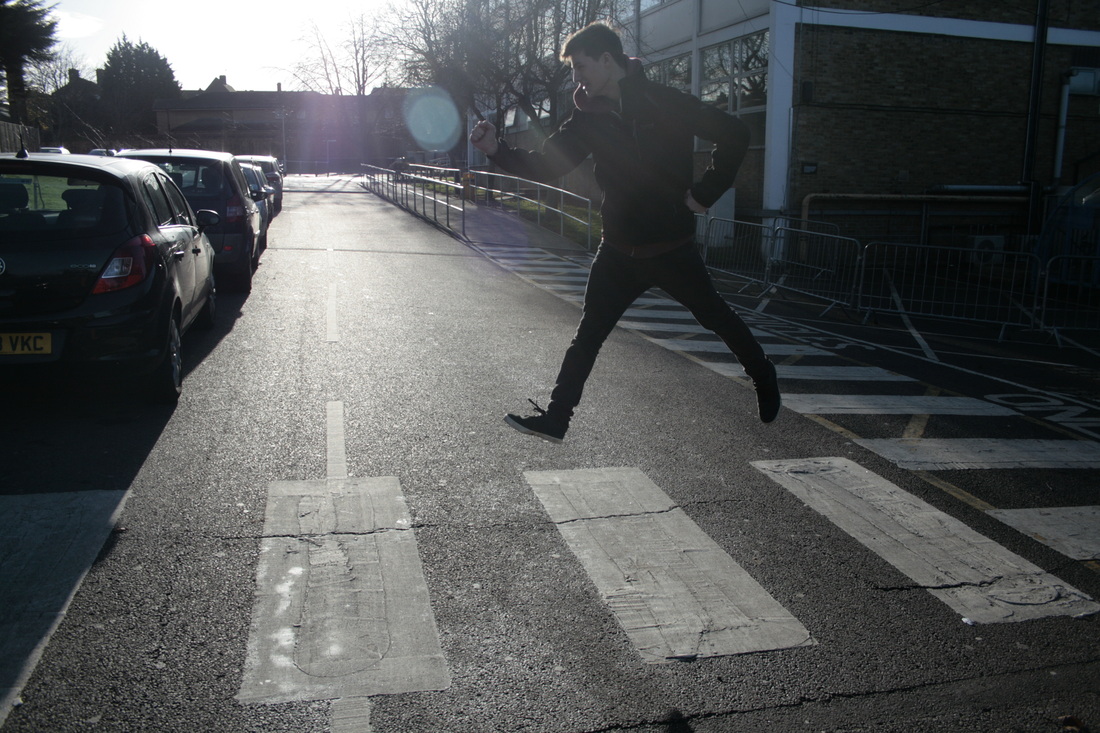
Another important aspect was that I wanted to make sure that the movement of the subject was relevant and clear to its surroundings. For example one of my better photo's (to the left of this text) shows my subject in mid air. He is sharp in focus but is also performing a walking like action as if he is walking along the crossing. This photo has a nice balance of light coming from behind the place in which the image was taken resulting in a nice stretched shadow of my subject.
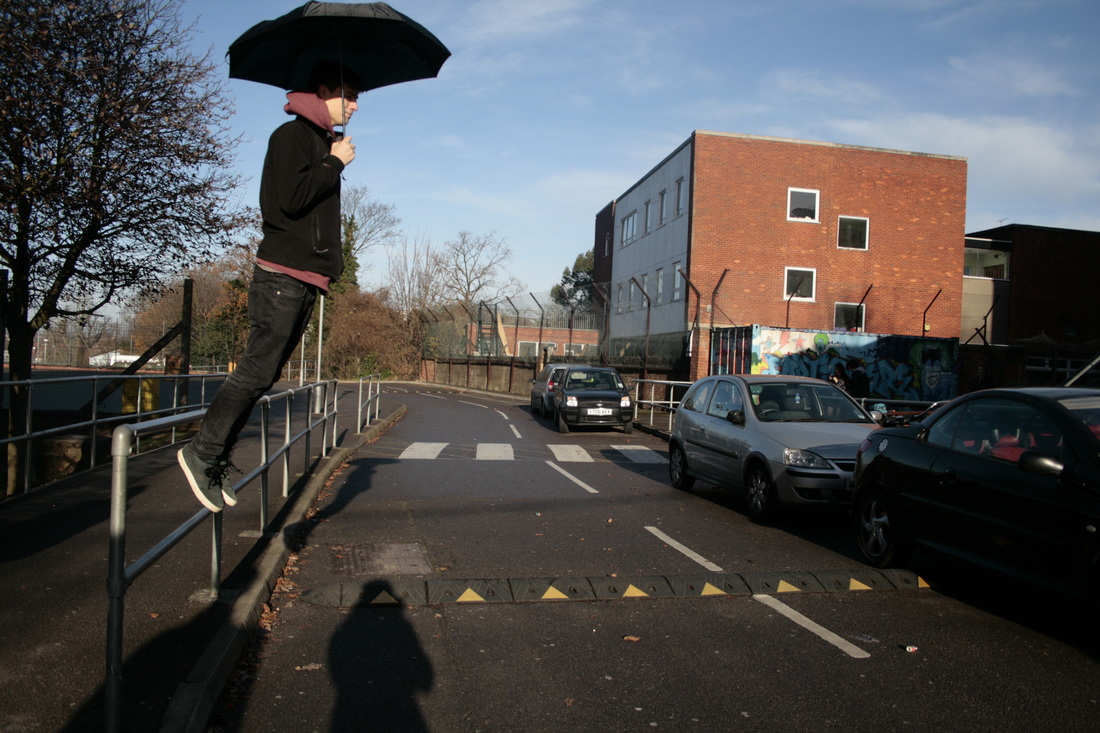
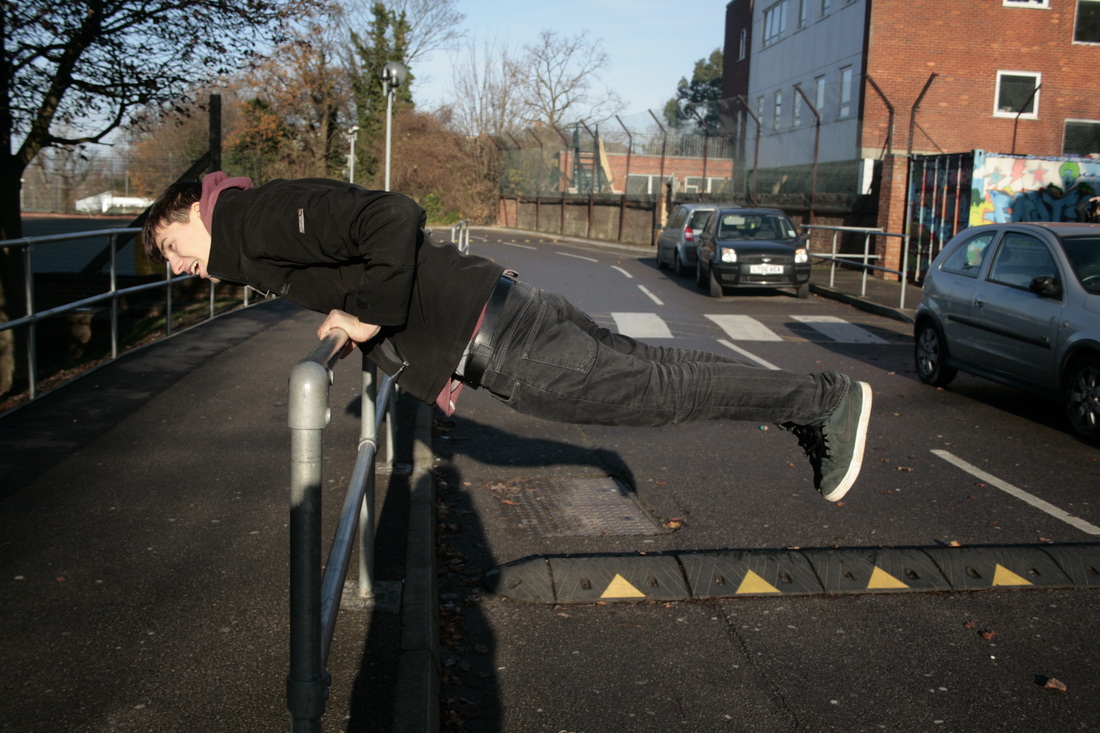
The other images also show interesting and exciting compositions in which the model is in mid air. For example below shows other successful images from my project. The photo in the far bottom left is another good photo as it shows the subject
in a very straight pose making it seem as if the person is truly standing in air. These image help me learn about different shutter speeds to creating still images when you have a moving subject very effectivley!
Another important aspect was that I wanted to make sure that the movement of the subject was relevant and clear to its surroundings. For example one of my better photo's (to the left of this text) shows my subject in mid air. He is sharp in focus but is also performing a walking like action as if he is walking along the crossing. This photo has a nice balance of light coming from behind the place in which the image was taken resulting in a nice stretched shadow of my subject.
The other images also show interesting and exciting compositions in which the model is in mid air. For example below shows other successful images from my project. The photo in the far bottom left is another good photo as it shows the subject
in a very straight pose making it seem as if the person is truly standing in air. These image help me learn about different shutter speeds to creating still images when you have a moving subject very effectivley!
Light
The project above shows my experiments with light. Light is after all the key to photography and therefore this was very helpful in learning how do to do bright and low light exposures I used a long shutter speen for this project to enable myself time to create the picture through the light. This worked very effectively and is represented in the above images!
